How to build a Gabion Wall
Gabion walls have been widely used for erosion control, civil engineering and road building for the past sixty years.
But did you know that Leonardo da Vinci designed a type of gabion called a Corbeille Leonard ("Leonard[o] basket") for the foundations of the San Marco Castle in Milan in the 15th century?
The use of Gabion construction has become popular in recent years for residential building and landscaping. The modern, industrial and natural look of this technique, as well as the versatility and the ability to do-it-yourself makes it a great option to consider!
Gabion baskets are so versatile, you can create just about any shape and size to suit your function. Either buy pre-made mesh baskets or make them yourself using galvanised mesh and heavy duty wire. Shape them into curves or stack baskets on top of each other, the options are endless!
Here are some ideas on how to use Gabion baskets:
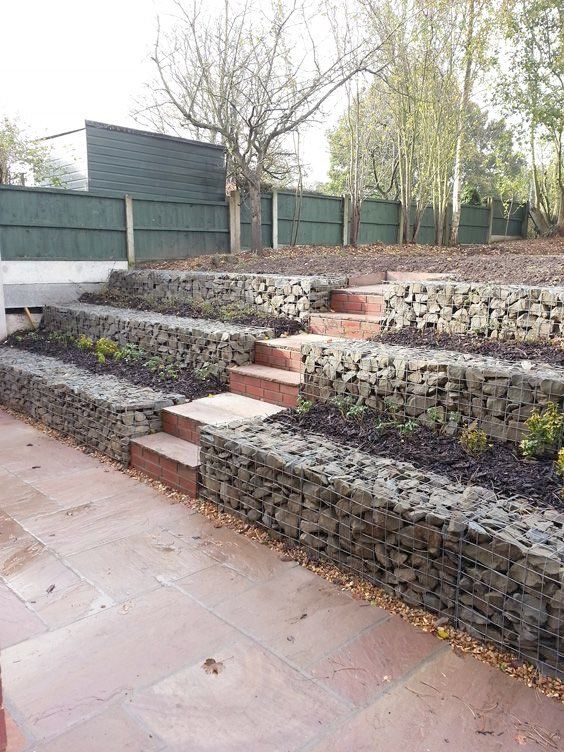
Retaining Walls
Image via HERE

Decorative Wall or edging to create a courtyard
Image via HERE

Firepit, outdoor oven, outdoor fireplace
Image via HERE

Fence
Image via HERE

Letterbox Holder
Image via HERE
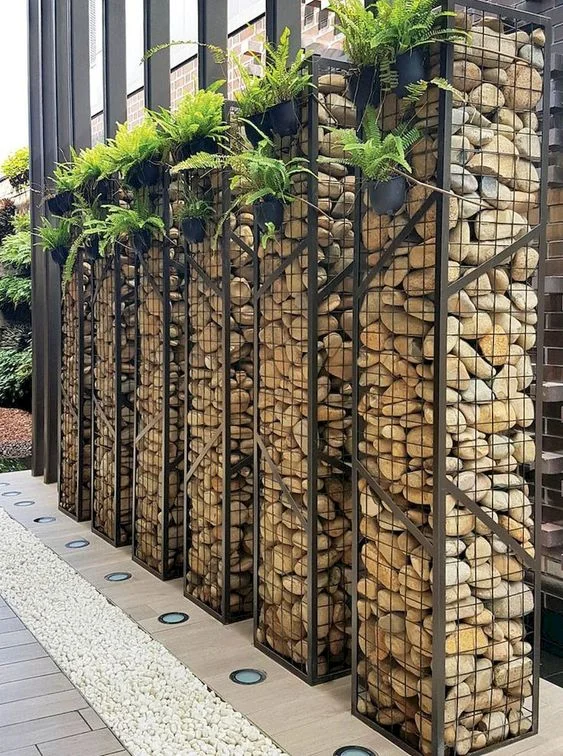
Privacy Wall
Image via HERE

Garden edging or raised garden bed
Image via HERE

Sculptural feature
Image via HERE

Wood or stone top bench seat
Image via HERE

Water Feature
Image via HERE

Outdoor Furniture
Image via HERE

Stairs
Image via HERE

Plant Holders
Image via HERE
How to build a Gabion structure?
Depending on the size and purpose of your Gabion wall it's best to speak to an expert on how you should prepare the foundations or pad for your wall.
If the wall is to be used as a small decorative feature for say a letterbox or firepit, then you wont necessarily need to dig out and set into a concrete foundation. But if you are building a retaining wall, tall fence or freestanding wall then you may need to dig a foundation and set with concrete, including reo bars to protect the structure from ground movement.
Drainage should also be considered, especially when dealing with slopes. You can get in touch with our team, who can help with your job: big or small!
What you'll need
Pre-made galvanised Gabion mesh cage/baskets
OR
DIY with Reinforcing mesh and wire to make spiral joiners and tension wires
Stones/Rocks/Rubble
Optional
Bricks or concrete blocks for centre of cage
Weed matting
Pliers
Stringline
Rust kill solution – to protect the ends of the wire and mesh
Reo bars
Cement and blue metal
Drainage materials
Things to consider before starting
What material will you use to fill the cages? Smooth river rocks, large flat edge rocks, broken up concrete, recycled bricks, cut timber logs, even recycled materials such as old wine bottles stacked on top of each other, old clay pipes and roof tiles.
Think carefully about the colour of the material and where it will be positioned. Match the tones of your house with the colour of the stones you chose... warm tones vs grey tones etc.
Consider the size of the basket to the size of rocks/stones to be used. If the mesh has large holes and you plan to use small stones you may need to inlay panels of smaller mesh so that the stones don't fall through.
Look at putting a garden edging in front of the pad to keep grass from growing through the wall.
Hire our 1.8t Little Digger or Bobcat with driver to move the materials around (save your back and your wheelbarrow). We can also deliver materials for you, using our 4t Tip Truck.
Ask us how!

Step by step
Level the ground to create a pad for the wall to sit on. Use a string line and spirit level where needed to get a flat surface. Our 1.8t Little Digger can level, smooth and excavate as well as remove excess dirt from site in our 4t Tip Truck.
Lay materials such as compacted gravel or weed matting on pad before starting.
Place the cage/basket into position before you start filling.
Spiral joiners wind through to attach the cage sides together then crimp the ends to stop them from making their way out. Use pliers to cut the joiners off at the end and for crimping. Tip: use electrical ties to hold sides in place while threading the joining wires through.
Use a central panel and corner bracing wires to stop the cage from buckling and bending from the weight of the rocks.
You can fill out the centre of the cages with bricks or concrete blocks. This saves money and time by reducing the number of stones you need.
Take your time when filling the cage and be mindful of using flat edges for the outer side of the cage to give you the best end result.
Once you are happy with the cage and you have checked it from all angles you can then wire the “lid” of the cage on.
Get creative!
Use different coloured rocks or stones to create a pattern in the wall, you can even inlay other materials to make a feature going through the wall.
Insert outdoor led lighting within the basket so that at night your wall glows with light shining through the stones.
Future-proof by placing electrical conduit into the basket/cage so that you can wire in deck lights or power a water feature.
Attach wall hanging planters to the outside of the cage and grow your herb garden or decorative plants on the Gabion wall.
Place old metal objects within the visible sides of the basket. It will create an interesting talking point or “treasure hunt” for visitors and kids to find all the hidden objects.
Get in touch with The Little Digger Company team on 0275 571 171 to discuss your plans today!